
windows10系统开机后提示“client mac addr:..”的详细步骤?
我们在操作windows10系统电脑的时候,常常会遇到windows10系统开机后提示“client mac addr:..”的问题。那么出现windows10系统开机后提示“client mac addr:..”的问题该怎么解决呢?很多对电脑不太熟悉的小伙伴不知道windows10系统开机后提示“client mac addr:..”到底该如何解决?其实只需要 1、首先开机连续敲击键盘上的del或是delete按键进入Bios,选择integrated pripharals中的onboard device 中,将LAn BooT RoM 设置为disabled,最后按F10保存退出即可,如下图:2、也有些主板是(例如:K8M800)开机连续敲击键盘上的del或是delete按键进入Bios,选择integrated pripharals进入,您会直接看到一项是“onboard LAn Boot RoM/板载网卡启动”的选项,将此项关闭,如图:就可以了。下面小编就给小伙伴们分享一下windows10系统开机后提示“client mac addr:..”具体的解决方法:
解决方案:
如果你的电脑不能进入windows10系统,那么需要查看硬盘是否连接正常,硬盘有无损坏,如果能进入windows10只是会先显示网卡启动界面,那么只需要到Bios中关闭网卡启动即可。
设置方法:
一、 示例Bios一,蓝色界面:
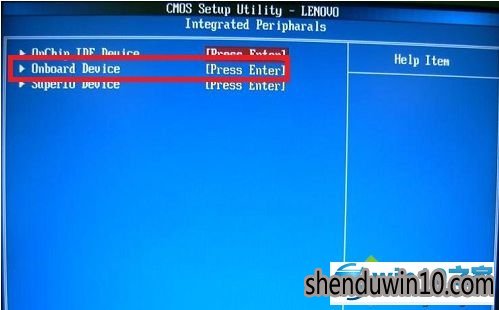
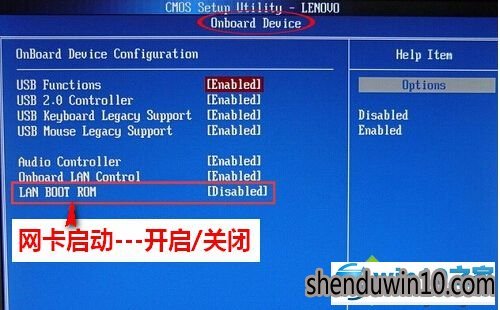
1、首先开机连续敲击键盘上的del或是delete按键进入Bios,选择integrated pripharals中的onboard device 中,将LAn BooT RoM 设置为disabled,最后按F10保存退出即可,如下图:
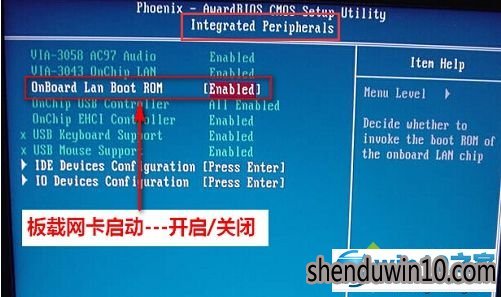
2、也有些主板是(例如:K8M800)开机连续敲击键盘上的del或是delete按键进入Bios,选择integrated pripharals进入,您会直接看到一项是“onboard LAn Boot RoM/板载网卡启动”的选项,将此项关闭,如图:
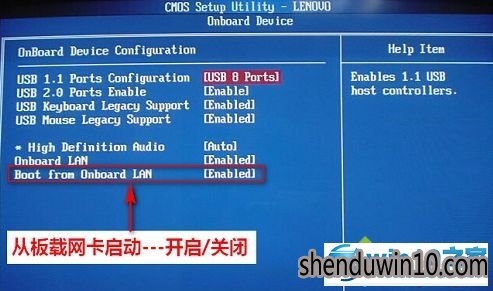
3、还有一些主板的机型开机连续敲击键盘上的del或是delete按键进入bios,选择integrated pripharals中的onboard device 中会看到名称为“Boot from onboard Lan/从板载网卡启动”的选项,将此项关闭,如图:
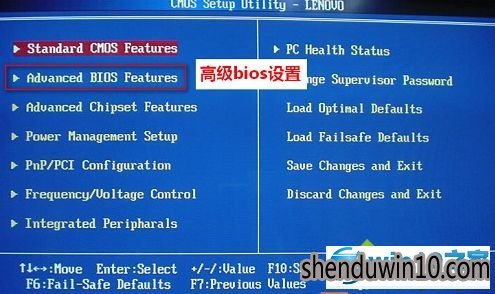
4、调节第一启动项为硬盘的方法,开机按del按键进入bios后,点击Advanced Bios Feature选项,如图:
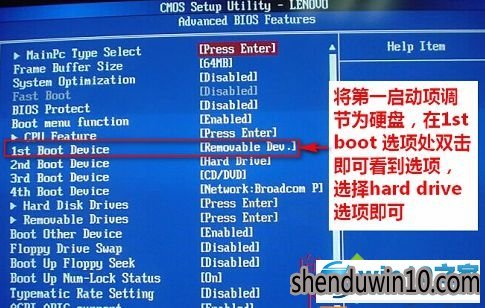
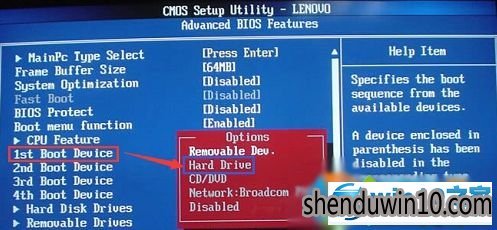
点击Advanced Bios Feature选项后,您会看到1st boot device的选项,此为第一启动选项的调节选项,双击后在弹出的对话框中选择Hard drive选项即可,如图:
二、 示例Bios二,灰色界面。
1、首先开机连续敲击键盘上的F1按键,进入Bios, 点击devices选项,再点击network setup进入,将pxE Boot Agent:改成disabled即可,最后按F10保存退出即可,如下图:

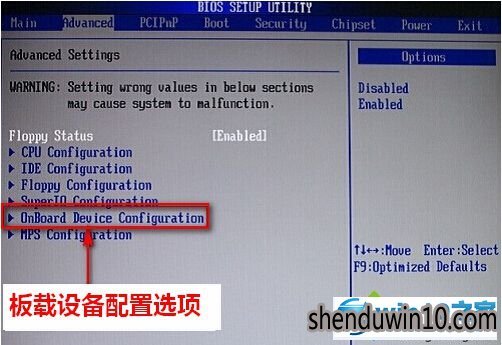
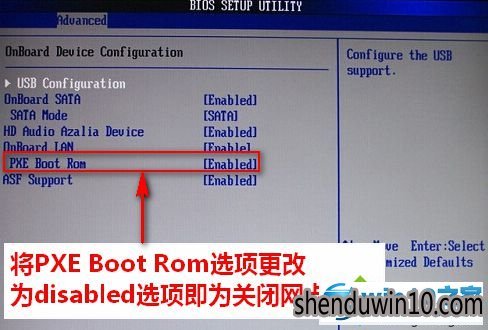
2、也有些主板(例如:AMd 690)的机型,开机按f1进入Bios界面,点击“Advanced”选项,可以看到“onBoard device Configuration”的选项,点击进入后就会看到名称为“pxE boot Rom”的选项,将此项关闭即可,如图:
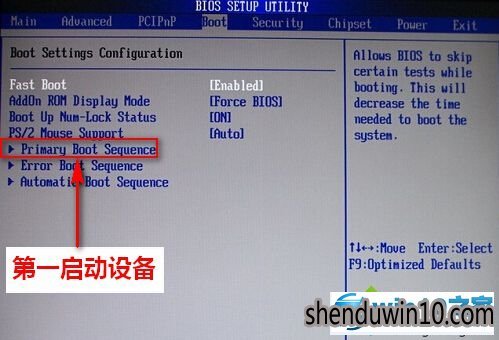
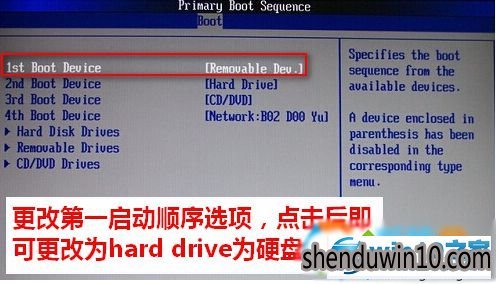
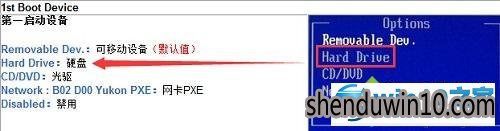
更改启动项的方法,进入bios后,找到BooT选项,点击primary boot sequence选项进入,更改1st boot device选项为hard drive硬盘启动即可,如图:
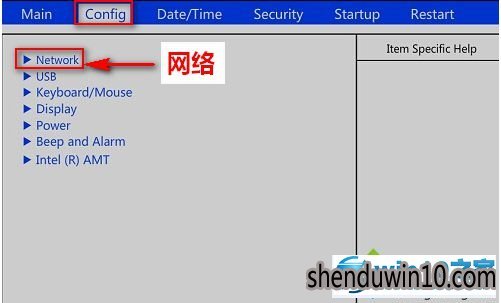
三、 Thinkpad机型,横板Bios界面下,关闭网络启动并调节硬盘为第一启动项的方法。
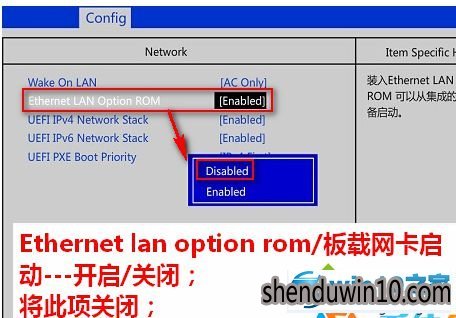
1、您开机连续敲击键盘上的F1按键,选择Config选项,下边在点击network选项,进入后,将Ethernet Lan option RoM选项,选择disabled即可;
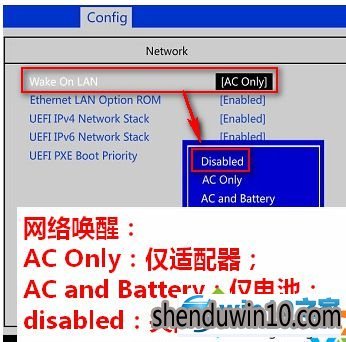
另外,如果您不需要网络唤醒的,也可以将wake on LAn关闭即为更改为disabled,如图:
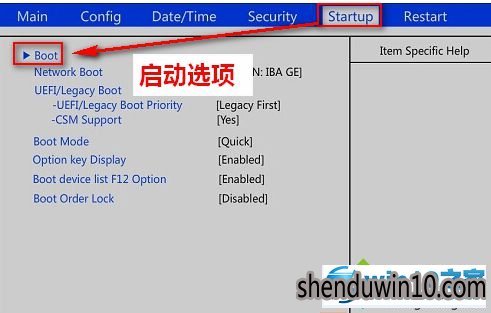
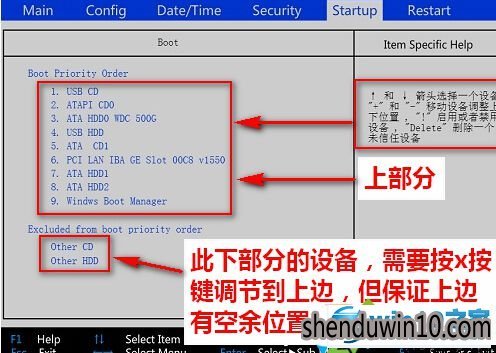
2、Thinkpad机型,开机按f1进入bios后,选择startup选项,之后点击boot进入,按照图示说明调节启动项(ATA Hdd选项为硬盘),如图:
以上就是windows10开机后提示“client mac addr:..”的原因和解决方案介绍了。有需要的用户可以参考上面的步骤,查找到设置位置然后关闭掉网卡启动。
以上,便是windows10系统开机后提示“client mac addr:..”的详细步骤的全部内容啦,希望可以帮助到您,感谢大家对本站的喜欢和浏览,觉得本文不错就收藏和分享起来吧!
- 专题推荐
- 深度技术系统推荐
- 1深度技术 Ghost Win10 32位 装机版 V2016.09(免激活)
- 2深度技术Ghost Win10 X32位 完美装机版2017.09月(免激活)
- 3深度技术Ghost Win10 x64位 特别纯净版v2018.01(绝对激活)
- 4萝卜家园Windows11 体验装机版64位 2021.09
- 5深度技术Ghost Win10 x64位 完美纯净版2019年05月(无需激活)
- 6深度技术Ghost Win10 X64 精选纯净版2021v03(激活版)
- 7深度技术 Ghost Win10 x86 装机版 2016年05月
- 8深度技术Ghost Win10 x64位 多驱动纯净版2019V08(绝对激活)
- 9深度技术Ghost Win10 X32增强修正版2017V01(绝对激活)
- 10深度技术Ghost Win10 (64位) 经典装机版V2017.07月(免激活)
- 深度技术系统教程推荐